DIY WREATHS YOUR NEIGHBOURS WILL FALL FOR
A STEP-BY-STEP GUIDE
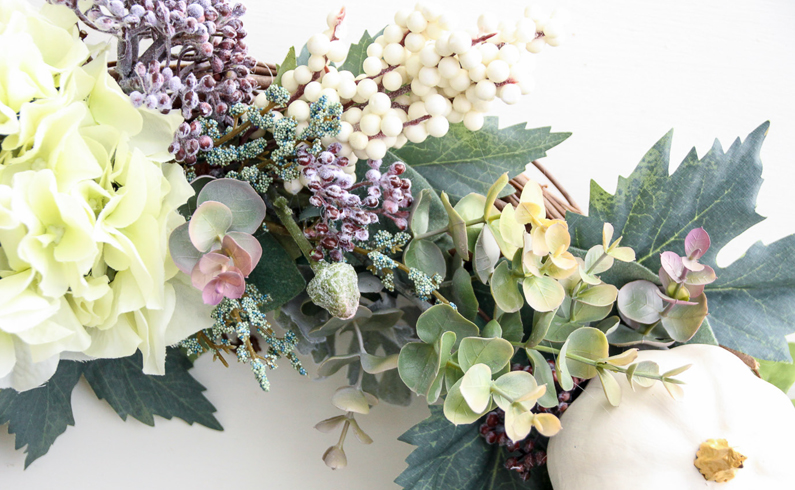
image credit: thehappyhousie.com
School’s back in session, and so is DECO DIY 101! For today’s lesson, we’ll be taking a look at how to create the perfect fall decoration — that is, an elegant homemade wreath. Please turn to page 12 in your textbooks and be sure to take notes, as this chapter will be on the midterm examination. Now, without further ado, let’s get started!
STEP
01
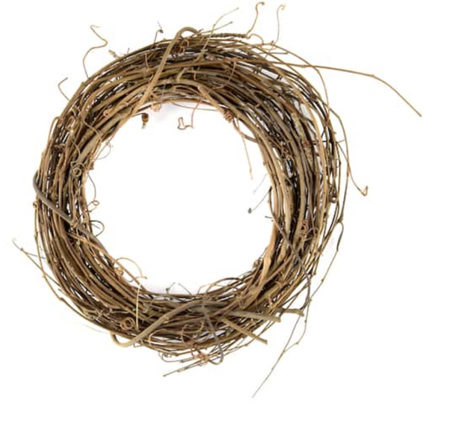
First and foremost, we’ll need a proper base for what will soon become the most beautiful autumn adornment you’ve ever made. We’ll begin with a classic grapevine work form. You should choose a size based on your individual taste and door profile, but anything similar to this 10” Grapevine Wreath should do the trick in most cases. You’ll have more space to personalize and work with when opting for a larger form, but if you prefer a little more subtlety, you can always choose something smaller like this 6” Natural Grapevine Wreath. This is the perfect base to add leaves, flowers, and other ornaments as you’ll see in the following sections.
STEP
02
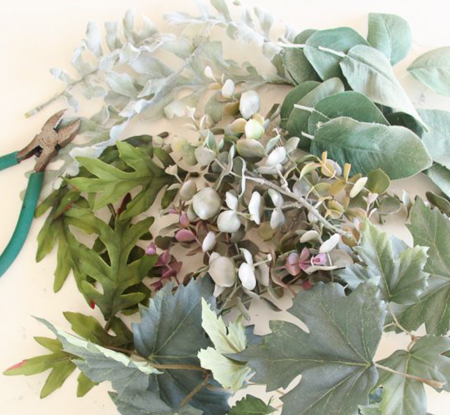
image credit: thehappyhousie.com
The next step is to build a bed of greenery on top of your grapevine as a solid decorative foundation. Holly, ivy, rosemary, pine, and eucalyptus serve as excellent fillers for creating the garland of your wreath. Better still, you can usually find any of these at your local florist or farmers’ market. We recommend using a combination of two or more for adding texture to your creation. Once you’ve decided on your foundation, lay out your greenery over the grapevine work form. Spread them evenly, layering them as necessary. Be sure to tuck the stems into the grapevine to fasten them, and you can even use a hot glue gun to hold everything in place if needed.
STEP
03
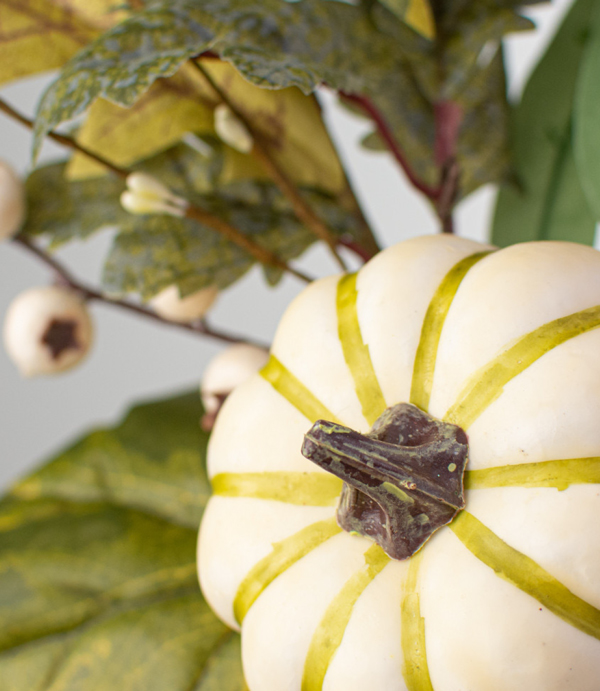
Now it’s time to place your more prominent pieces and decorations. From berries to small pumpkins, perennials, feathers, and so much more, there are endless options to choose from when considering your wreath decorations. More importantly, there are basically no wrong answers! Choose what you like most, what you feel reflects your personality, and what best compliments your existing exterior décor. Don’t be afraid to cut your materials or mold them as you see fit. It’s your wreath after all. When layering them atop your greenery, try to create several different focal points or “centrepieces”, spread evenly around your wreath. This will create a more comprehensive visual the whole way around, ensuring that no part of your wreath is sparse or lacking. After you’ve arranged as you see fit, use a hot glue gun to secure everything together.
STEP
04
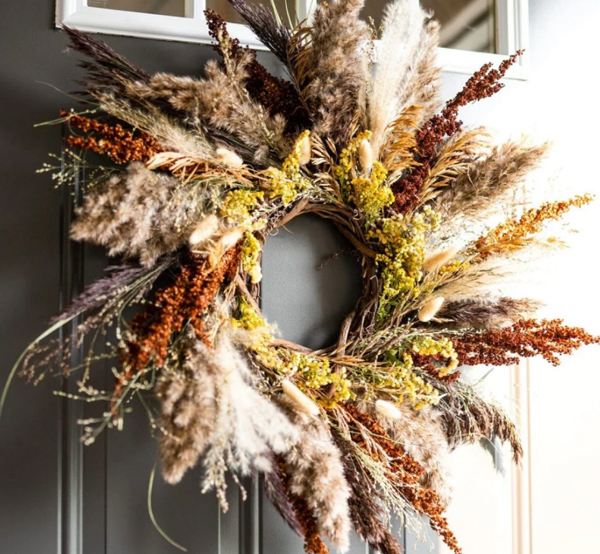
image credit: chicpursuit.com
The last but perhaps most important step is to hang it on your door! Use a non-stick adhesive hook to place your wreath with no strings attached (pun intended), or choose yarn for a more traditional look. After all is said and done, you’ll have a marvelous fall wreath that’s sure to make your neighbours jealous.


OFFICE HOURS
MONDAY - FRIDAY 8:30AM - 5:00PM
Prices, incentives and specifications are subject to change without notice. E. & O.E. Actual useable square footage may vary from the stated floor
area, as they may include OTB areas. All renderings are artist concept only and colours may vary from renderings shown.© 2024 DECO Homes is a
registered trademark of DECO Homes Building Inc. All rights reserved.
Privacy Policy.